GitLab5.4をCentOS6.4にインストールする。(2)
さて、前回からの続き。・・・忘れたw。次、何するんだっけ?
GitLabのインストール
いよいよ、GitLabのインストール。
基本的にここを見ながら進めていきます・・・が、分からんわwww
https://github.com/gitlabhq/gitlabhq/blob/master/doc/install/installation.md
# su - git
$ cd /home/git
$ git clone https://github.com/gitlabhq/gitlabhq.git gitlabInitialized empty Git repository in /home/git/gitlab/.git/ remote: Counting objects: 54488, done. remote: Compressing objects: 100% (18934/18934), done. remote: Total 54488 (delta 39937), reused 48920 (delta 34852) Receiving objects: 100% (54488/54488), 22.59 MiB | 505 KiB/s, done. Resolving deltas: 100% (39937/39937), done.$ cd gitlab
$ git checkout 5-4-stableBranch 5-4-stable set up to track remote branch 5-4-stable from origin. Switched to a new branch '5-4-stable'
GitLabの設定やらディレクトリの作成やら
そしたら、とりあえず設定ファイルのexampleを基にして設定ファイルを作成してちょこちょこっと修正、
・・・と思ったけど、gitlab.ymlを眺めてみたら、なんかデフォルトで大丈夫そう?
$ pwd
/home/git/gitlab$ cp ./config/gitlab.yml.example ./config/gitlab.yml
参考にしているページに従ってディレクトリを作成したりchownしたりchmodしたり。
$ chown -R git log/
$ chown -R git tmp/
$ chmod -R u+rwX log/
$ chmod -R u+rwX tmp/
$ mkdir /home/git/gitlab-satellites
$ mkdir tmp/pids/
$ mkdir tmp/sockets/
$ chmod -R u+rwX tmp/pids/
$ chmod -R u+rwX tmp/sockets/
$ mkdir public/uploads
$ chmod -R u+rwX public/uploads/
さて、ここで「はて」と悩む。
unicornって何?ガンダム?サイコフレーム発動していいの?
あと前回gitの設定もしたけど、以下もやっとく。
git config --global core.autocrlf input
GitLabで使用するDB(MySQL)に関する設定
次はGitLabで使用するDBに関する設定ファイルを作成して修正。
$ cp ./config/database.yml.mysql ./config/database.yml
$ vi ./config/database.yml# # PRODUCTION # production: adapter: mysql2 encoding: utf8 reconnect: false database: gitlabhq_production pool: 10 # username: root # password: "secure password" username: gitlab password: gitlab # host: localhost # socket: /tmp/mysql.sock # # Development specific # development: adapter: mysql2 encoding: utf8 reconnect: false database: gitlabhq_development pool: 5 # username: root # password: "secure password" username: gitlab password: gitlab # host: localhost # socket: /tmp/mysql.sock # socket: /tmp/mysql.sock # Warning: The database defined as "test" will be erased and # re-generated from your development database when you run "rake". # Do not set this db to the same as development or production. test: &test adapter: mysql2 encoding: utf8 reconnect: false database: gitlabhq_test pool: 5 # username: root # password: username: gitlab password: gitlab # host: localhost # socket: /tmp/mysql.sockGemのインストール
次の難関。つ〜か、分からん。charlock_holmesって何だ?
シャーロック・ホームズ?探偵?コナンじゃないの?
とりあえずインストールする。
$ su - root
# cd /home/git/gitlab
# gem install charlock_holmes --version '0.6.9.4'Fetching: charlock_holmes-0.6.9.4.gem (100%) Building native extensions. This could take a while... ERROR: Error installing charlock_holmes: ERROR: Failed to build gem native extension. /usr/local/bin/ruby extconf.rb checking for main() in -licui18n... no which: no brew in (/usr/lib/qt-3.3/bin:/usr/kerberos/sbin:/usr/kerberos/bin:/usr/local/sbin:/usr/local/bin:/sbin:/bin:/usr/sbin:/usr/bin:/root/bin) checking for main() in -licui18n... no *************************************************************************************** *********** icu required (brew install icu4c or apt-get install libicu-dev) *********** *************************************************************************************** *** extconf.rb failed *** Could not create Makefile due to some reason, probably lack of necessary libraries and/or headers. Check the mkmf.log file for more details. You may need configuration options. Provided configuration options: --with-opt-dir --without-opt-dir --with-opt-include --without-opt-include=${opt-dir}/include --with-opt-lib --without-opt-lib=${opt-dir}/lib --with-make-prog --without-make-prog --srcdir=. --curdir --ruby=/usr/local/bin/ruby --with-icu-dir --without-icu-dir --with-icu-include --without-icu-include=${icu-dir}/include --with-icu-lib --without-icu-lib=${icu-dir}/lib --with-icui18nlib --without-icui18nlib --with-icui18nlib --without-icui18nlib Gem files will remain installed in /usr/local/lib/ruby/gems/1.9.1/gems/charlock_holmes-0.6.9.4 for inspection. Results logged to /usr/local/lib/ruby/gems/1.9.1/gems/charlock_holmes-0.6.9.4/ext/charlock_holmes/gem_make.out
・・・そして躓く。くぅ。。。
メッセージを見た限りlibicu-devが無いから・・・か?
ならば!libicu.i686 4.2.1-9.1.el6_2 @anaconda-CentOS-201303020136.i386/6.4 libicu-devel.i686 4.2.1-9.1.el6_2 base libicu-doc.noarch 4.2.1-9.1.el6_2 base
なんだこれ?とりあえずlibicu-develをインストールしてから再度ホームズをインストールする。# gem install charlock_holmes --version '0.6.9.4'
Building native extensions.  This could take a while...
Successfully installed charlock_holmes-0.6.9.4
1 gem installed
Installing ri documentation for charlock_holmes-0.6.9.4...
Installing RDoc documentation for charlock_holmes-0.6.9.4...
うまくいったっぽい。
続けてbundle install。bundle exec。これ、かなり時間掛かった。。。ちょっと風呂入ってくる。。。# bundle install --deployment --without development test postgres unicorn aws
# chmod 666 /home/git/gitlab/log/production.log
# su - git
$ cd /home/git/gitlab
$ bundle exec rake gitlab:setup RAILS_ENV=production: : : Administrator account created: login.........admin@local.host password......5iveL!feGitLabのサービス起動設定
とりあえずサービス起動用のシェルをどっかから持ってきて起動させてみる。# curl --output /etc/init.d/gitlab https://raw.github.com/gitlabhq/gitlab-recipes/5-0-stable/init.d/gitlab
# chmod +x /etc/init.d/gitlab
# service gitlab start・・・なんか動いてる気がしない。つ〜か動いてない。とりあえず放置。。。
Apacheで動かすための設定。
なんかよく分からんが、Apacheが/home/git以下にアクセスできるように以下を実施。
# usermod -G git apache
# chmod g+rX /home/git次にバーチャルホストの設定。
httpd.confにGit用のバーチャルホストを定義する。そしてhttpdの再起動。# cd /etc/httpd/conf
# vi httpd.confNameVirtualHost *:80 # # VirtualHost example: # Almost any Apache directive may go into a VirtualHost container. # The first VirtualHost section is used for requests without a known # server name. # ## ServerAdmin webmaster@dummy-host.example.com # DocumentRoot /www/docs/dummy-host.example.com # ServerName dummy-host.example.com # ErrorLog logs/dummy-host.example.com-error_log # CustomLog logs/dummy-host.example.com-access_log common # ServerName www.mngsvr01.gitlab DocumentRoot /home/git/gitlab/public # service httpd restart
とりあえずクライアントPCのhostsファイルに上記で設定したバーチャルホストを書いとく。
クライアントPCがWindows7の場合、まずはメモ帳アイコンを右クリックして表示されるメニューから「管理者として実行...」を選択して起動する。
そしてC:\Windows\System32\drivers\etc\hostsを開いて以下のように追記。192.168.0.11 www.mngsvr01.gitlab # VirtualHost for GitLabさて、これでクライアントPCから以下のURLでアクセスしてみる。
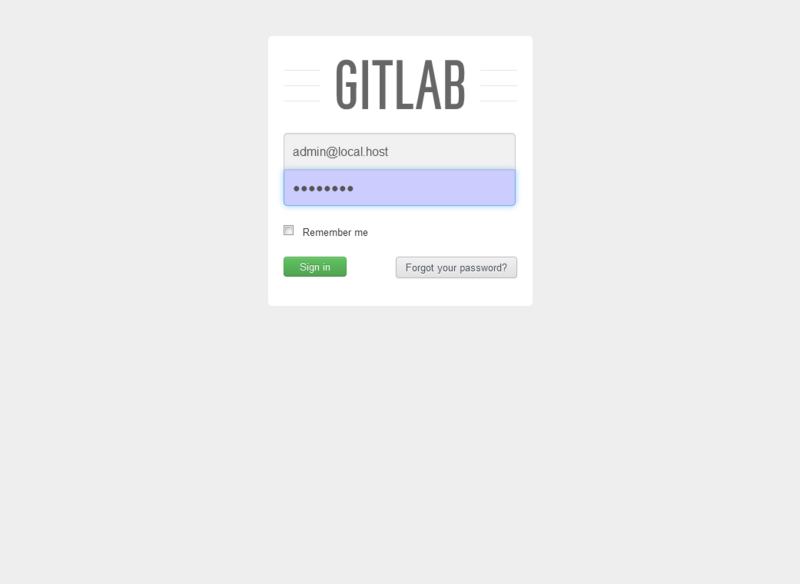
そしたら、こうだぁぁぁ!
やっと画面出た!泣けた!!
もうサービス起動しない時は諦めかけた。
あと巷じゃnginx連携ばかりでApache連携分からなくて諦めかけた。
いやぁ、良かった。
次はGitLabの使い方、つ〜かそもそもGitの使い方って・・・てな感じで。
ん?
ふとGitLabのGitHub覗いてみたんだが・・・
あれ?6.0-stableって・・・
うわぁぁぁぁぁぁぁぁぁぁぁぁぁぁぁぁぁぁぁぁぁぁぁぁぁぁぁぁぁぁ
